Webforms have a "Content" component (a page where the form is embedded) and a "Structure" component (all the settings for the form) found under each of those areas in the top toolbar. Configuration for form fields, confirmation pages, email handlers, and more is found under "Structure." Many configuration options are available. Overview of Webform Features.
On this page:
Email Webform Responses
A webform can, optionally, send an email when a new response is submitted.
- Go to Structure > Webforms.
On the webform overview page, find the form. Click the operations dropdown button and click Settings.
Image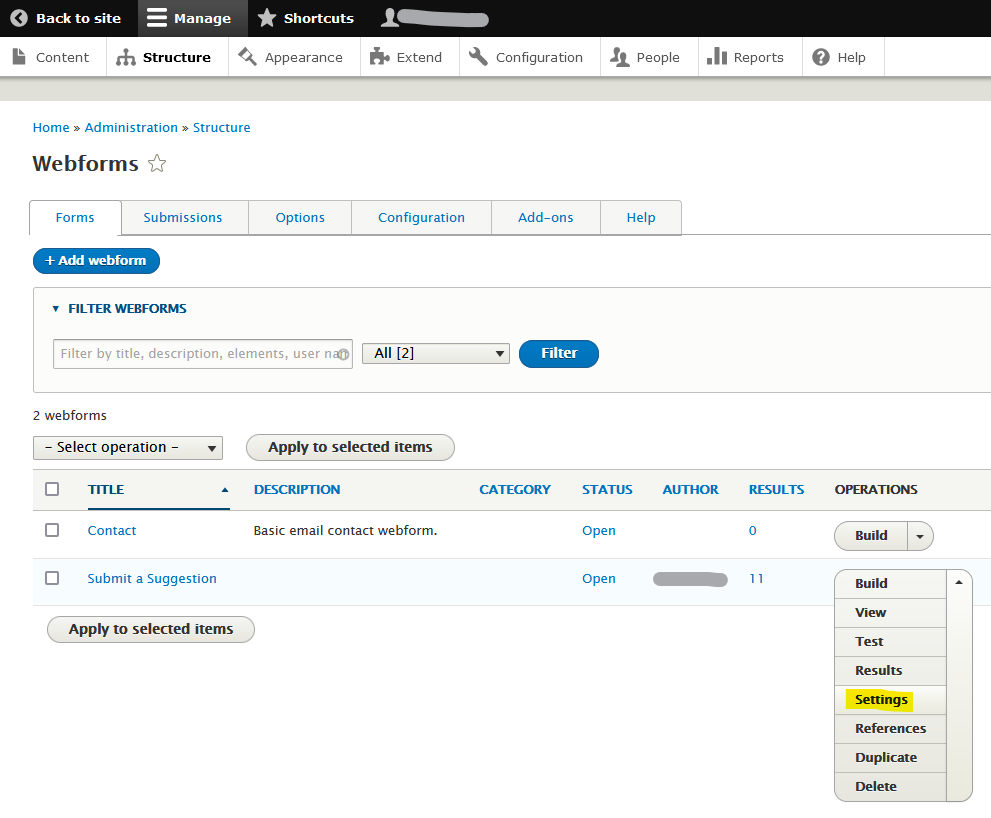
Under Settings, click the Emails/Handlers tab.
Image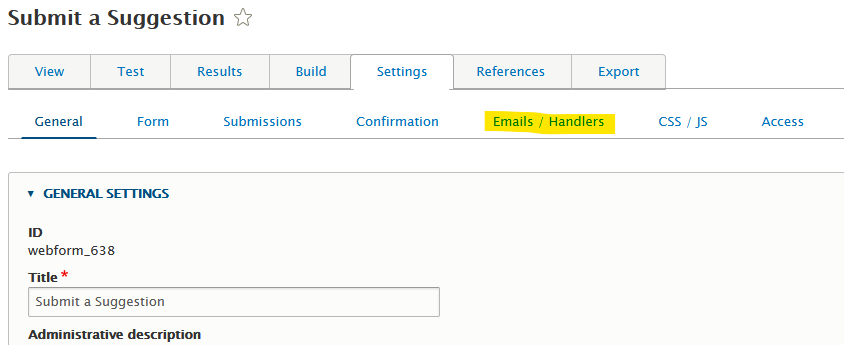
- Perform one of the following:
If you are adding an email for the first time, click "Add Email." The Add email handler configuration will open on the edge of the screen.
Image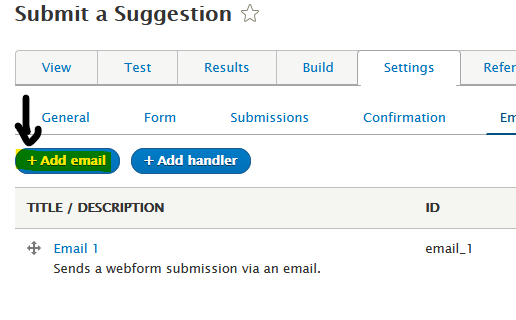
- If you are editing an existing email, click the Edit button next to the appropriate email.
- The email handler configuration will open on the edge of the screen. Set appropriate values for the following:
- Title: Default is "Email." Add additional detail if needed, e.g. "Email Youth Services"
- Send to:
- To email: Default is [site:mail], which is the sitewide default.
- Choose "Custom To email address" to enter a different email.
If your form asks for the respondent's email, you may choose the respondent's email by selecting the matching field listed under "Elements."
Image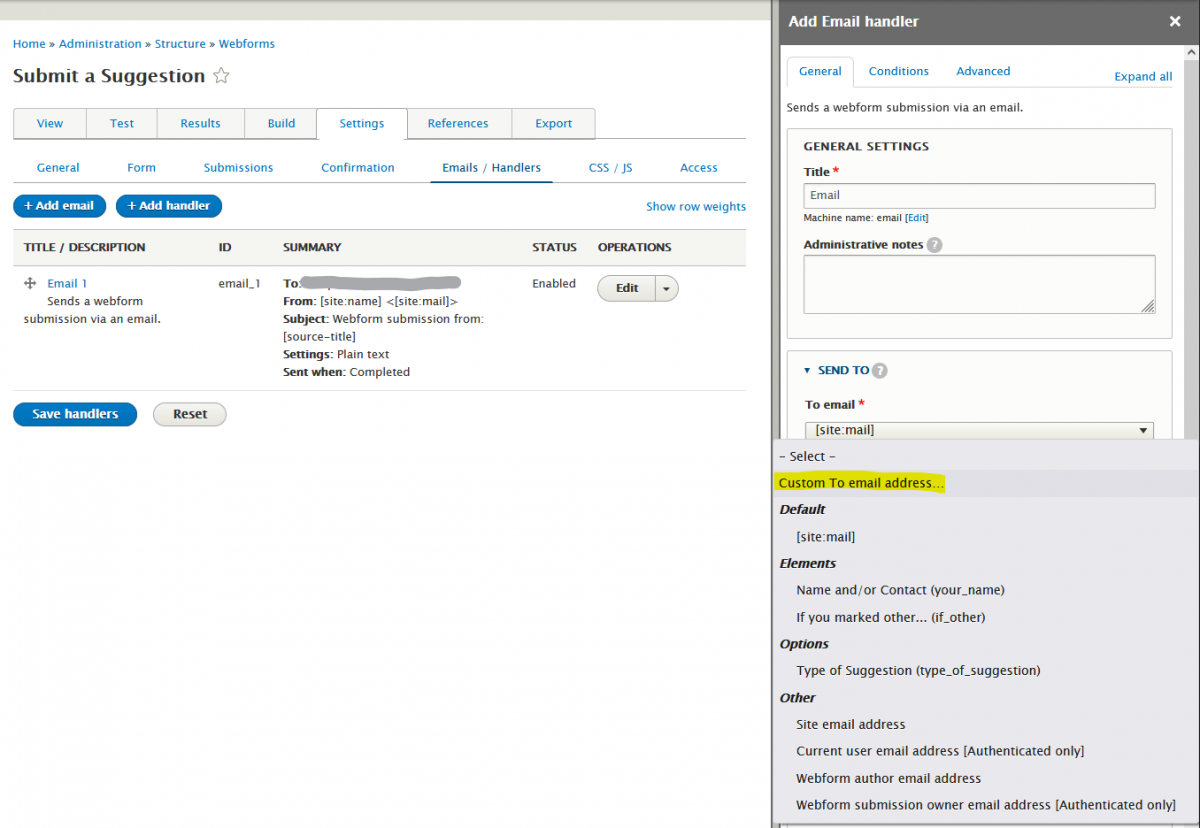
- To email: Default is [site:mail], which is the sitewide default.
- CC email: Default is None
- BCC email: Default is None
- Send from (website/domain) - keep the defaults here:
- From email: Default is [site:mail]
- From name: Default is [site:name]
- Image
![Select [site:mail] for the webform Send from address](/sites/drupal.scls.info/files/styles/medium/public/2025-07/webform-send-from-default.png?itok=w3XohfQr)
- Reply-to email: Default. Optionally, if the form requires an email, you can select the email field from the list of Elements in the drop-down.
- Message - in most cases keep the defaults here:
- Subject: Default is Webform submission from: [webform_submission:source-title]
- Body: Default
Click Save at the bottom of the email handler configuration.
Image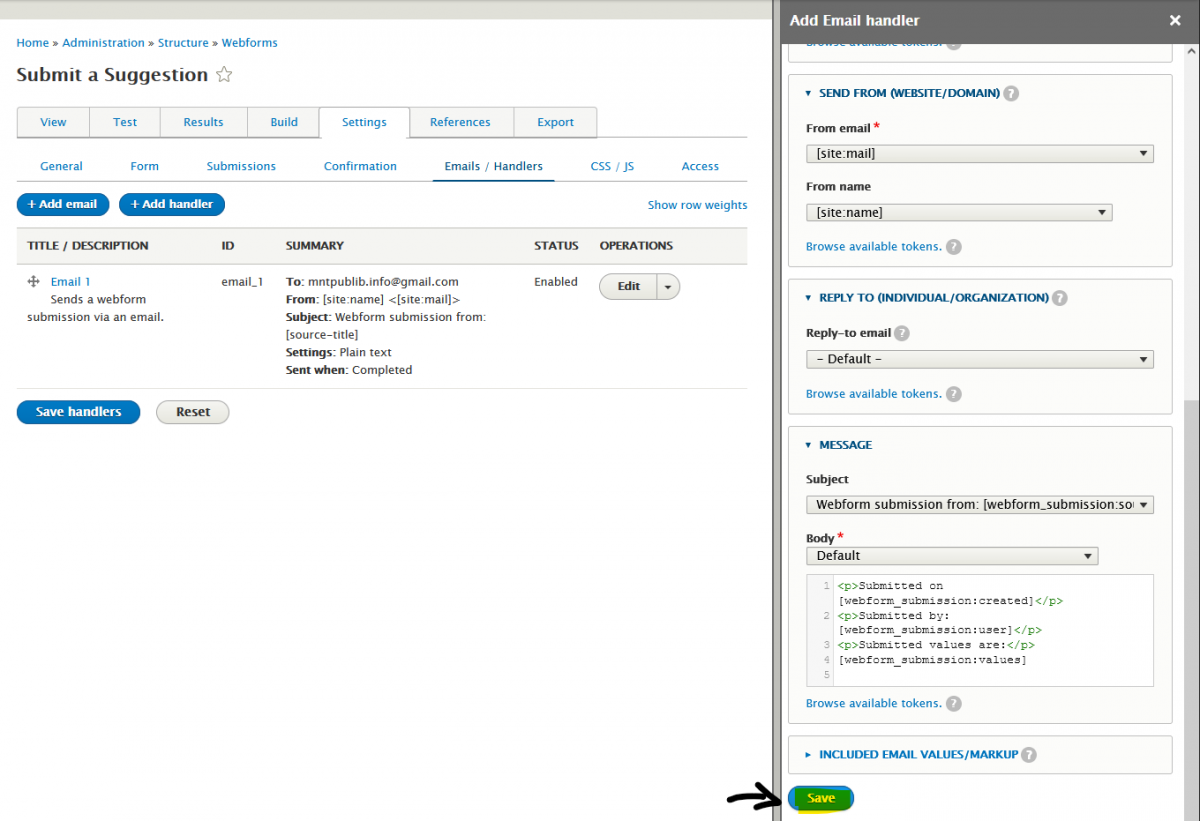
- Test the form to be sure the email sends as expected.
Include a PayPal button or other code in confirmation messages
In Drupal 9 Webform limits what HTML tags are allowed for most elements by default, including the markup you can put into confirmation messages. If you need to include something that is restricted by default, such as <form> and <input> tags that make up a PayPal Donate button, you can change Webform to allow a wider range of HTML tags.
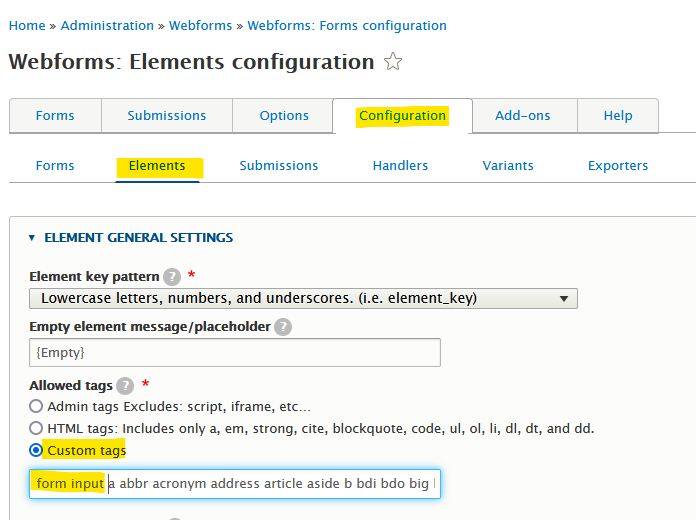
- Go to Structure > Webforms > Configuration tab > Elements sub-tab.
- Under Allowed tags, select Custom tags (default setting is Admin tags).
- A llist of allowed custom tags will appear. Review the list to see if it contains the tag you wish to use.
- Add the tag that you wish to use to the list of allowed custom tags.
- Click Save at the bottom of the screen.