Media Library is an image and document management tool that enables you to find media that exists in your site and to add new media items. It allows you to search, sort, and create media items.
Accessing the Media Library
The Media Library is accessed through a field dedicated for uploading Media, or through the Insert from Media Library button on the CKEditor toolbar.
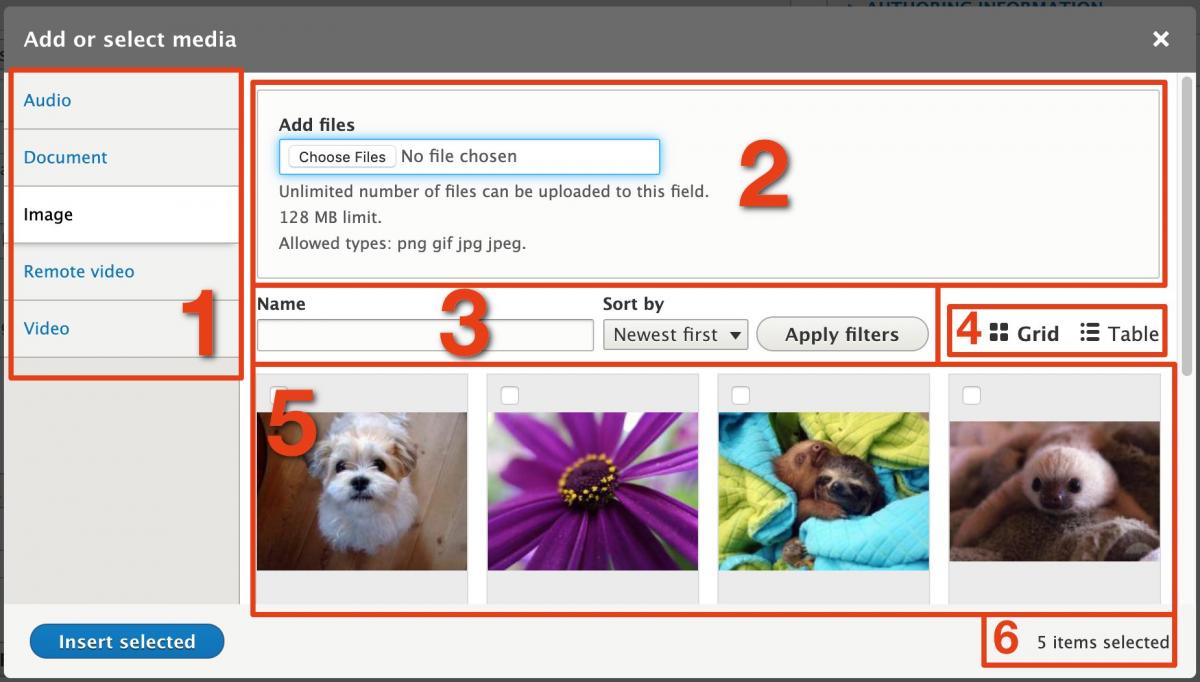
Parts of the media library

- Media types: The media library is divided up by media type, and these vertical tabs filter items in the library by type. Which media types, and therefore which tabs, are available can vary depending on site configuration. Most SCLS-supported sites will have tabs only for Document and Image. If you select items on a given tab, then switch to another tab, your prior selections are remembered.
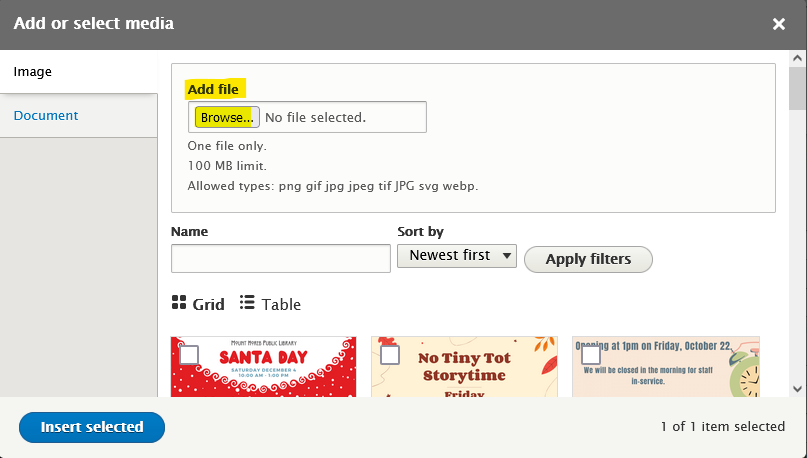
- Add files: This area allows you to add media items to the media library. Exactly which field(s) will be present in this area can vary by media type and site configuration.
- Search/Sort: Here you can search for particular media items in the library, or apply various filters to the available items.
- Grid/Table: The media library can be displayed in two ways: as a grid or as a table. These icons allow you to switch between the two layouts. Any selections you make in the grid layout will be remembered in the table layout, and vice versa.
- Media items: This is the current set of media items available to you, with filters and/or search terms applied. The media library works a little bit like a shopping cart; clicking the checkbox for any given item will add it to your selection, and you can click the "Insert selected" button to "check out" and add the selected items to a field or text editor.
- Counter: This counter keeps track of how many media items you have selected so far, across all types. Depending on site configuration, there may be a limit to the number of items you can select, in which case the counter will say something like "3 of 10 items selected". (If there is no limit, the counter will simply say something like "2 items selected".)
Adding media to the library
Add media to the media library by using the small form directly above the grid (or table) of media items:

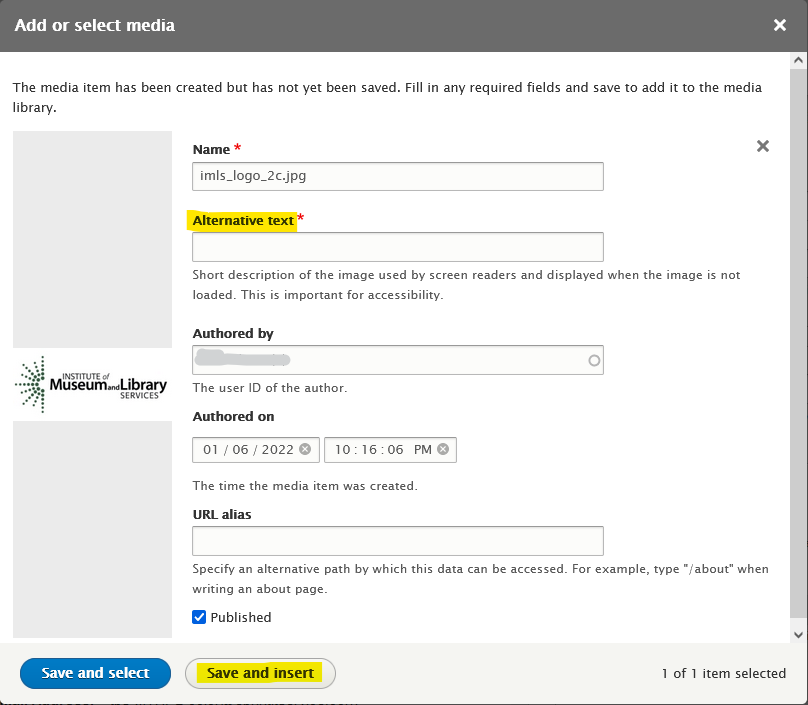
When you add media to the library, you will see an interstitial form to fill out additional information. Exactly what information you will need to provide varies by site configuration and by the type of media you're adding. You will at least need to fill out any required fields associated with that media type; if you're adding an image, you will also need to provide alternative text for screen readers.

If you had previously chosen items from the media library before you started adding new items, those selections will be remembered; you can see them in the "Additional selected media" area. When embedding media with CKEditor, you can only add one item at a time.
When you have finished entering required information, you have two choices:
- Save and select will save the new media item(s) into the library, then return to it so you can select more items.
- Save and insert will save your new media item(s) and insert them, along with any prior selections, directly into the field or text editor from which you opened the media library.
Adapted from "Overview" and "Embedding media with CKEditor" available from Drupal.org. This documentation can be used in accordance with the Creative Commons License, Attribution-ShareAlike 2.0.